


Linux系统下安装FTPS服务器
在Linux 系统中,搭建FTP服务器是一个常见需求。然而,为了增强数据传输 的安全性,我们可以选择安装FTPS服务,
即在FTP协议基础上加入SSL/TLS加密功能。为FTP协议和数据通道增加了SSL安全功能。SSL是一个在客户机和具有SSL功能的服务器之间的安全连接中对数据进行加密和解密的协议。
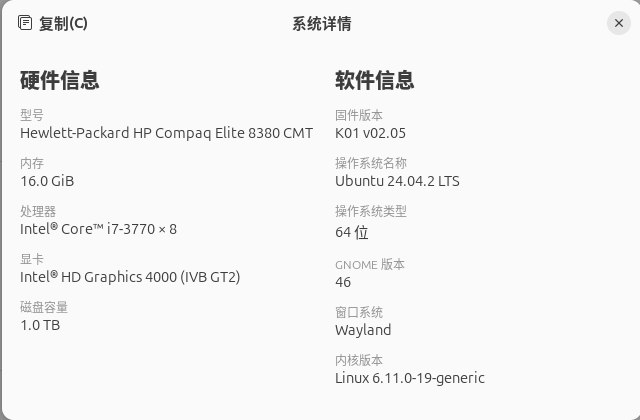
部署环境
安装vsftpd
首先,我们需要安装vsftpd(Very Secure FTP Daemon)作为FTP服务器的实现。在绝大多数Linux发行版中,vsftpd都是可用的。
sudo apt update
sudo apt install vsftpd
sudo是linux系统管理指令,是允许系统管理员让普通用户执行一些或者全部的root命令的一个工具。
apt(Advanced Packaging Tool)是 Ubuntu 中的 Shell 前端软件包管理器。
生成SSL证书
SSL(Secure Socket Layer)是身份验证和加密的一种协议。TLS是SSL协议的后续版本(TLS更牛逼)
它们是用于在互联网两台计算机之间进行数据加密,让数据传输更安全。
私有密钥是独有的,一般位于服务器上,用于解密由公共密钥加密老过的信息;公有密钥是公有的,与服务器进行交互的每个人都可以持有公有密钥,用公钥加密的信息只能由私有密钥来解密。
Openssl
OpenSSL是一个强大的开源工具,用于实现SSL和TLS协议,保障网络通信的安全。它不仅提供了加密库,还包括了命令行工具,可以用于创建证书、生成密钥、测试SSL/TLS连接等。
Openssl安装
sudo apt-get install openss接下来,我们需要使用Openssl生成SSL证书用来加密数据传输。执行以下命令生成服务端证书:
创建CA证书
CSR文件必须有CA的签名才可形成证书,可将此文件发送到verisign等地方由它验证,要交一大笔钱,何不自己做CA呢。
进入证书放置路径
cd /etc/ssl/test目录赋权
chmod 777 /etc/ssl/test生成私钥ca.key
openssl genrsa -out ca.key 2048生成证书请求文件ca.csr
openssl req -new -key ca.key -out ca.csr -days 3650期间会要求录入信息
You are about to be asked to enter information that will be incorporated

into your certificate request.

What you are about to enter is what is called a Distinguished Name or a DN.

There are quite a few fields but you can leave some blank

For some fields there will be a default value,

If you enter '.', the field will be left blank.

-----

Country Name (2 letter code) [AU]:CN

State or Province Name (full name) [Some-State]:

Locality Name (eg, city) []:

Organization Name (eg, company) [Internet Widgits Pty Ltd]:192.168.168.222

Organizational Unit Name (eg, section) []:192.168.168.222

Common Name (e.g. server FQDN or YOUR name) []:192.168.168.222

Email Address []:renew@renew.com

Please enter the following 'extra' attributes

to be sent with your certificate request

A challenge password []:

An optional company name []:
生成自签名证书ca.crt
openssl x509 -req -in ca.csr -signkey ca.key -out ca.crt -days 3650创建用户证书
生成私钥server.key
openssl genrsa -out server.key 2048生成证书请求server.csr
openssl req -new -key server.key -out server.csr -days 3650期间会要求录入信息
You are about to be asked to enter information that will be incorporated
into your certificate request.
What you are about to enter is what is called a Distinguished Name or a DN.
There are quite a few fields but you can leave some blank
For some fields there will be a default value,
If you enter '.', the field will be left blank.
-----
Country Name (2 letter code) [AU]:
State or Province Name (full name) [Some-State]:
Locality Name (eg, city) []:
Organization Name (eg, company) [Internet Widgits Pty Ltd]:192.168.168.222
Organizational Unit Name (eg, section) []:192.168.168.222
Common Name (e.g. server FQDN or YOUR name) []:192.168.168.222
Email Address []:renew@renew.com

Please enter the following 'extra' attributes
to be sent with your certificate request
A challenge password []:
An optional company name []:
合并生成证书server.crt
openssl x509 -req -CA ca.crt -CAkey ca.key -CAcreateserial -in server.csr -out server.crt -days 3650生成证书server.pem
cat server.key server.crt > server.pem生成证书server.pfx
cat server.key server.crt > server.pfx生成客户端证书client.crt
cp ca.crt client.crt最后得到以下证书群:
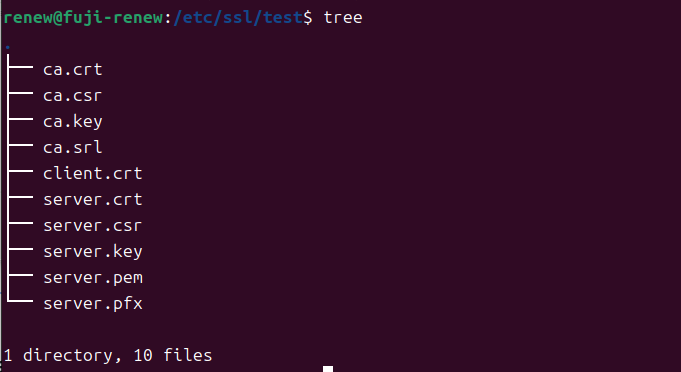
安装CA证书到服务器
将证书复制到/usr/local/share/ca-certificates文件夹然后运行update-ca-certificates
sudo cp /etc/ssl/test/ca.crt /usr/local/share/ca-certificates
sudo cp /etc/ssl/test/ca.csr /usr/local/share/ca-certificates
sudo cp /etc/ssl/test/server.crt /usr/local/share/ca-certificates
sudo cp /etc/ssl/test/server.csr /usr/local/share/ca-certificates
sudo update-ca-certificates修改vsftpd.conf配置文件
1.首先备份原先的配置文件:
sudo cp /etc/vsftpd.conf /etc/vsftpd.conf.bak2.编辑vsftpd配置文件:
sudo vim /etc/vsftpd.conf3.将ftp服务器与自己的钥匙和证书进行捆绑
在打开的配置文件中,修改为以下内容:
# Example config file /etc/vsftpd.conf
#
# The default compiled in settings are fairly paranoid. This sample file
# loosens things up a bit, to make the ftp daemon more usable.
# Please see vsftpd.conf.5 for all compiled in defaults.
#
# READ THIS: This example file is NOT an exhaustive list of vsftpd options.
# Please read the vsftpd.conf.5 manual page to get a full idea of vsftpd's
# capabilities.
#
#
# Run standalone?  vsftpd can run either from an inetd or as a standalone
# daemon started from an initscript.
listen=NO
#
# This directive enables listening on IPv6 sockets. By default, listening
# on the IPv6 "any" address (::) will accept connections from both IPv6
# and IPv4 clients. It is not necessary to listen on *both* IPv4 and IPv6
# sockets. If you want that (perhaps because you want to listen on specific
# addresses) then you must run two copies of vsftpd with two configuration
# files.
listen_ipv6=YES
#
# Allow anonymous FTP? (Disabled by default).
anonymous_enable=YES
anon_root=/home/ftp
#
# Uncomment this to allow local users to log in.
local_enable=YES
#
# Uncomment this to enable any form of FTP write command.
write_enable=YES
#
# Default umask for local users is 077. You may wish to change this to 022,
# if your users expect that (022 is used by most other ftpd's)
local_umask=022
#
# Uncomment this to allow the anonymous FTP user to upload files. This only
# has an effect if the above global write enable is activated. Also, you will
# obviously need to create a directory writable by the FTP user.
anon_upload_enable=YES
# Uncomment this if you want the anonymous FTP user to be able to create
# new directories.
anon_mkdir_write_enable=YES
#
# Activate directory messages - messages given to remote users when they
# go into a certain directory.
dirmessage_enable=YES
#
# If enabled, vsftpd will display directory listings with the time
# in  your  local  time  zone.  The default is to display GMT. The
# times returned by the MDTM FTP command are also affected by this
# option.
use_localtime=YES
#
# Activate logging of uploads/downloads.
# Activate logging of uploads/downloads.
xferlog_enable=YES
#
# Make sure PORT transfer connections originate from port 20 (ftp-data).
connect_from_port_20=YES
#
# If you want, you can arrange for uploaded anonymous files to be owned by
# a different user. Note! Using "root" for uploaded files is not
# recommended!
#chown_uploads=YES
#chown_username=whoever
#
# You may override where the log file goes if you like. The default is shown
# below.
xferlog_file=/var/log/vsftpd.log
#
# If you want, you can have your log file in standard ftpd xferlog format.
# Note that the default log file location is /var/log/xferlog in this case.
#xferlog_std_format=YES
#
# You may change the default value for timing out an idle session.
#idle_session_timeout=600
#
# You may change the default value for timing out a data connection.
#data_connection_timeout=120
#
# It is recommended that you define on your system a unique user which the
# ftp server can use as a totally isolated and unprivileged user.
#nopriv_user=ftpsecure
#
# Enable this and the server will recognise asynchronous ABOR requests. Not
# recommended for security (the code is non-trivial). Not enabling it,
# however, may confuse older FTP clients.
#async_abor_enable=YES
#
# By default the server will pretend to allow ASCII mode but in fact ignore
# the request. Turn on the below options to have the server actually do ASCII
# mangling on files when in ASCII mode.
# Beware that on some FTP servers, ASCII support allows a denial of service
# attack (DoS) via the command "SIZE /big/file" in ASCII mode. vsftpd
# predicted this attack and has always been safe, reporting the size of the
# raw file.
# ASCII mangling is a horrible feature of the protocol.
#ascii_upload_enable=YES
#ascii_download_enable=YES
#
# You may fully customise the login banner string:
#ftpd_banner=Welcome to blah FTP service.
#
# You may specify a file of disallowed anonymous e-mail addresses. Apparently
# useful for combatting certain DoS attacks.
#deny_email_enable=YES
# (default follows)
#banned_email_file=/etc/vsftpd.banned_emails
#
local_root=/home/renew/ftp
# You may restrict local users to their home directories.  See the FAQ for
# the possible risks in this before using chroot_local_user or
# chroot_list_enable below.
#chroot_local_user=YES
#
# You may specify an explicit list of local users to chroot() to their home
# directory. If chroot_local_user is YES, then this list becomes a list of
# users to NOT chroot().
# (Warning! chroot'ing can be very dangerous. If using chroot, make sure that
# the user does not have write access to the top level directory within the
# chroot)
chroot_local_user=YES
allow_writeable_chroot=YES
chroot_list_enable=YES
# (default follows)
chroot_list_file=/etc/vsftpd.chroot_list
#
# You may activate the "-R" option to the builtin ls. This is disabled by
# default to avoid remote users being able to cause excessive I/O on large
# sites. However, some broken FTP clients such as "ncftp" and "mirror" assume
# the presence of the "-R" option, so there is a strong case for enabling it.
#ls_recurse_enable=YES
#
# Customization
#
# Some of vsftpd's settings don't fit the filesystem layout by
# default.
#
# This option should be the name of a directory which is empty.  Also, the
# directory should not be writable by the ftp user. This directory is used
# as a secure chroot() jail at times vsftpd does not require filesystem
# access.
secure_chroot_dir=/var/run/vsftpd/empty
#
# This string is the name of the PAM service vsftpd will use.
pam_service_name=vsftpd
#
# This option specifies the location of the RSA certificate to use for SSL
# encrypted connections.
#rsa_cert_file=/etc/ssl/private/vsftpd.pem
#rsa_private_key_file=/etc/ssl/private/vsftpd.pem
#ssl_enable=YES

userlist_enable=YES
userlist_deny=NO
userlist_file=/etc/vsftpd.user_list
#local_root=/home
seccomp_sandbox=NO
allow_writeable_chroot=YES
#
# Uncomment this to indicate that vsftpd use a utf8 filesystem.
utf8_filesystem=YES
#
#
#SSL
ssl_enable=YES
allow_anon_ssl=NO
force_local_data_ssl=NO
force_local_logins_ssl=NO
ssl_tlsv1=YES
ssl_sslv2=YES
ssl_sslv3=YES

rsa_cert_file=/etc/ssl/test/server.pfx
rsa_private_key_file=/etc/ssl/test/server.key


#被动模式
pasv_enable=YES
pasv_min_port=30000
pasv_max_port=35000编辑结束后,按下Esc按键退出编辑模式,输入:wq 进行保存退出。
重启vsftpd服务
配置完成后,重启vsftpd服务以使修改生效:
sudo systemctl restart vsftpd测试FTPS服务
使用客户端连接到您的FTPS服务器,
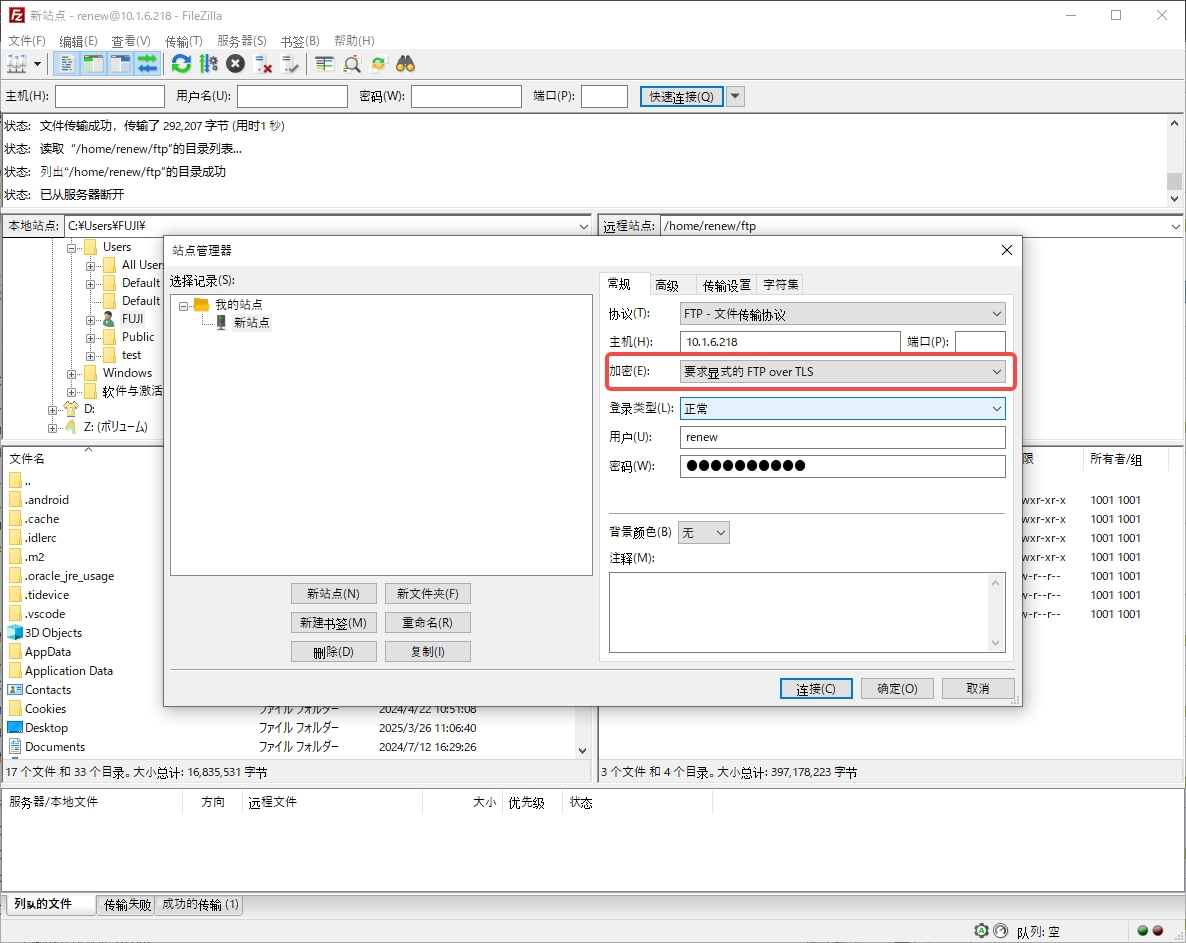
在FileZilla中,输入你的服务器地址、端口号,用户名和密码,并确保选择FTPS作为连接类型。
进行照片文件的连接和传输操作。
需要注意的是,在使用手动导入客户端证书client.crt时,客户端设备时间需与服务端一致!
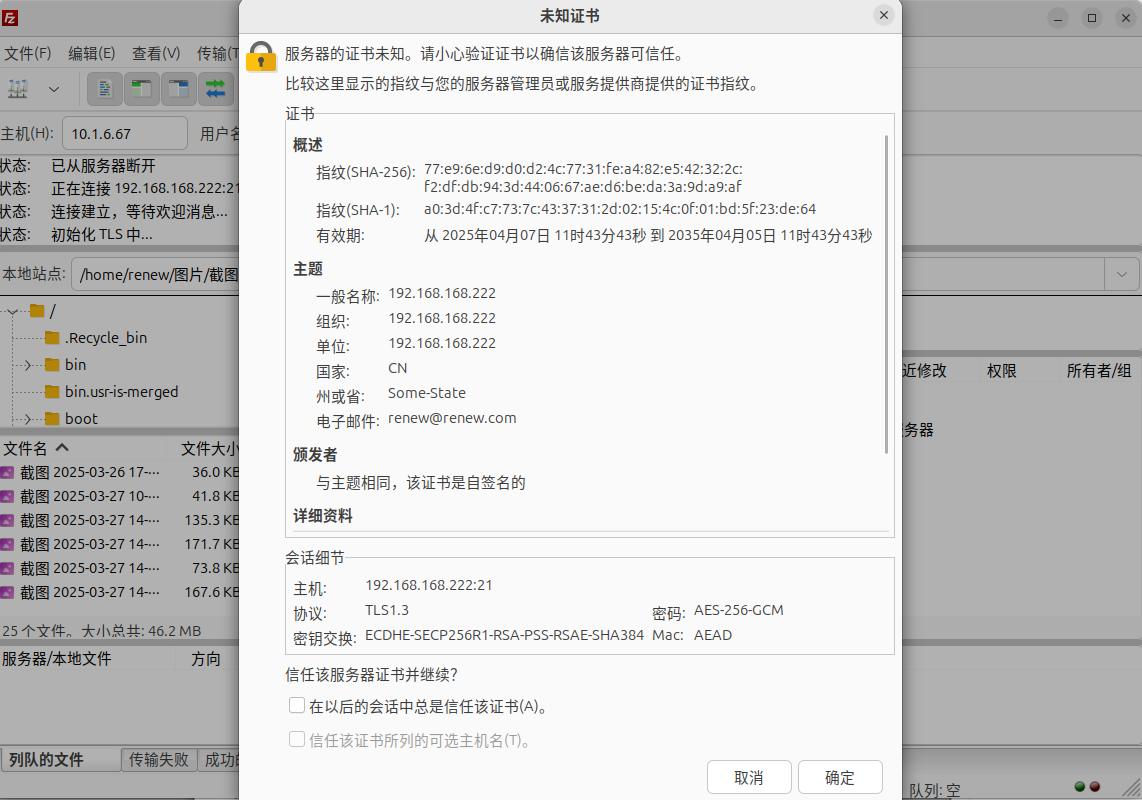
可见证书信息与设置的一致
文件能够顺利传输
通过抓包确认SSL加密传输
安装Wireshark
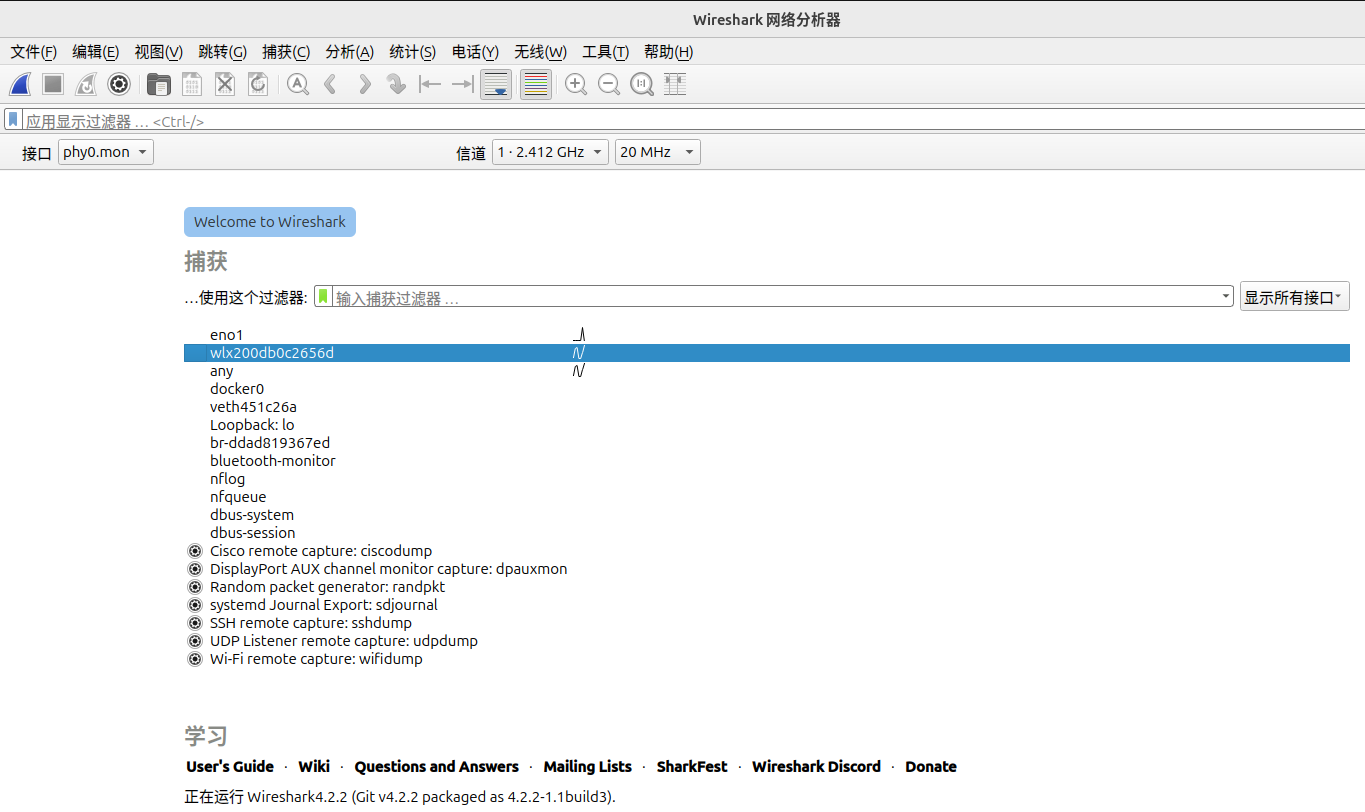
sudo apt install wireshark启动Wireshark
sudo wiresharkeno1为我的有线LAN
wlx200db0c265d为无线网卡
无加密传输示例
客户端选择明文传输,或不信任SSL证书
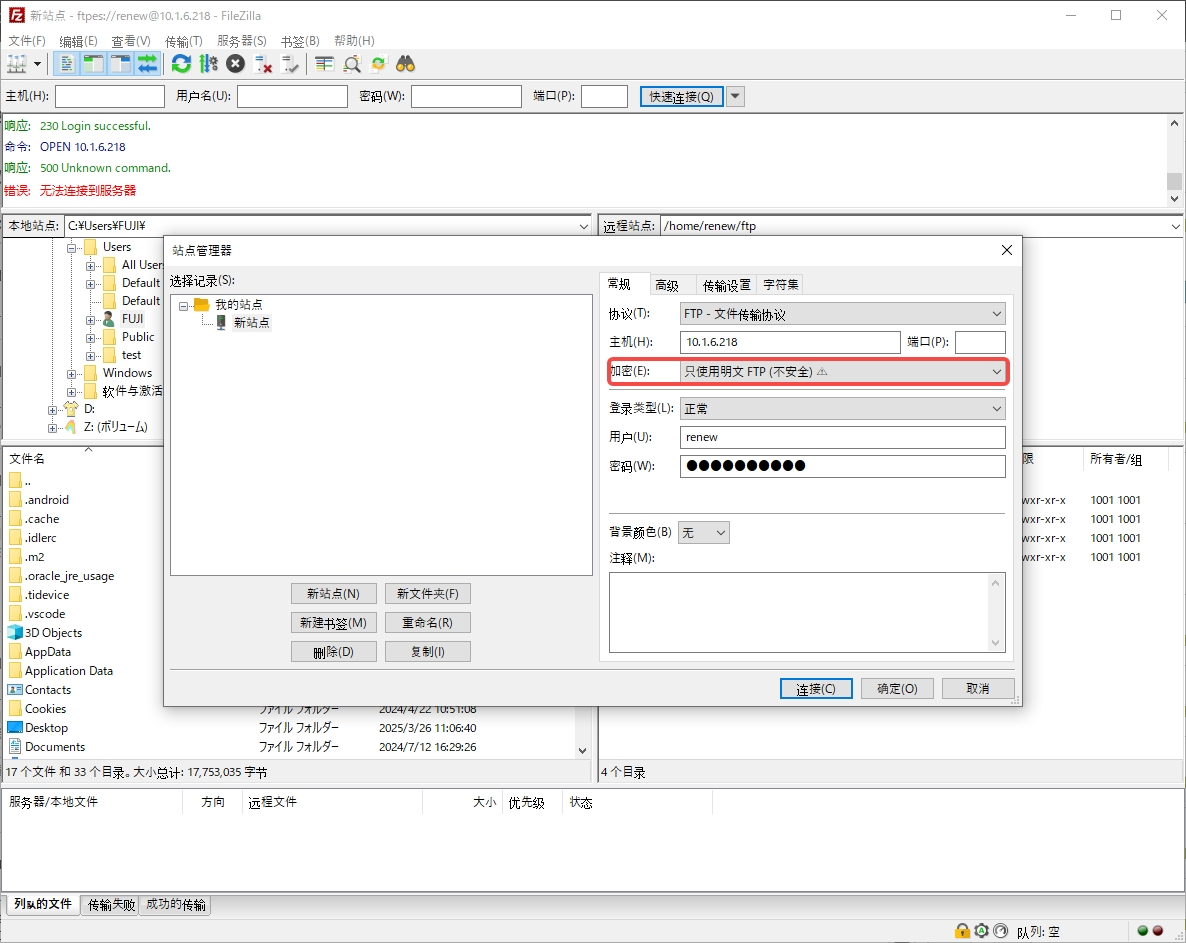
可见包都是使用FTP协议进行明文传输

加密传输示例
客户端选择TLS,并信任SSL证书
可见Info栏中Hello的握手过程
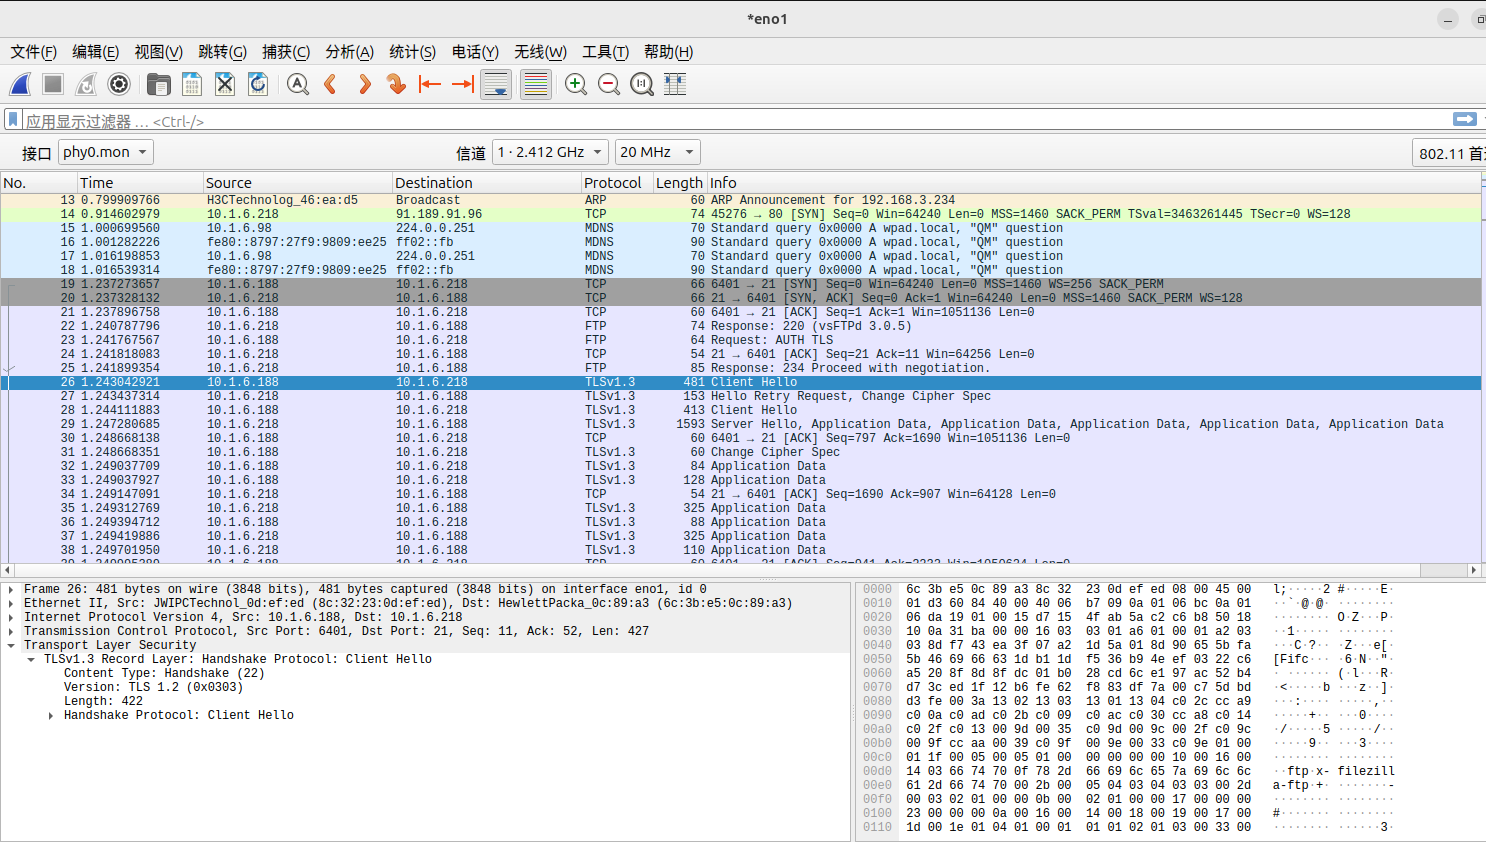
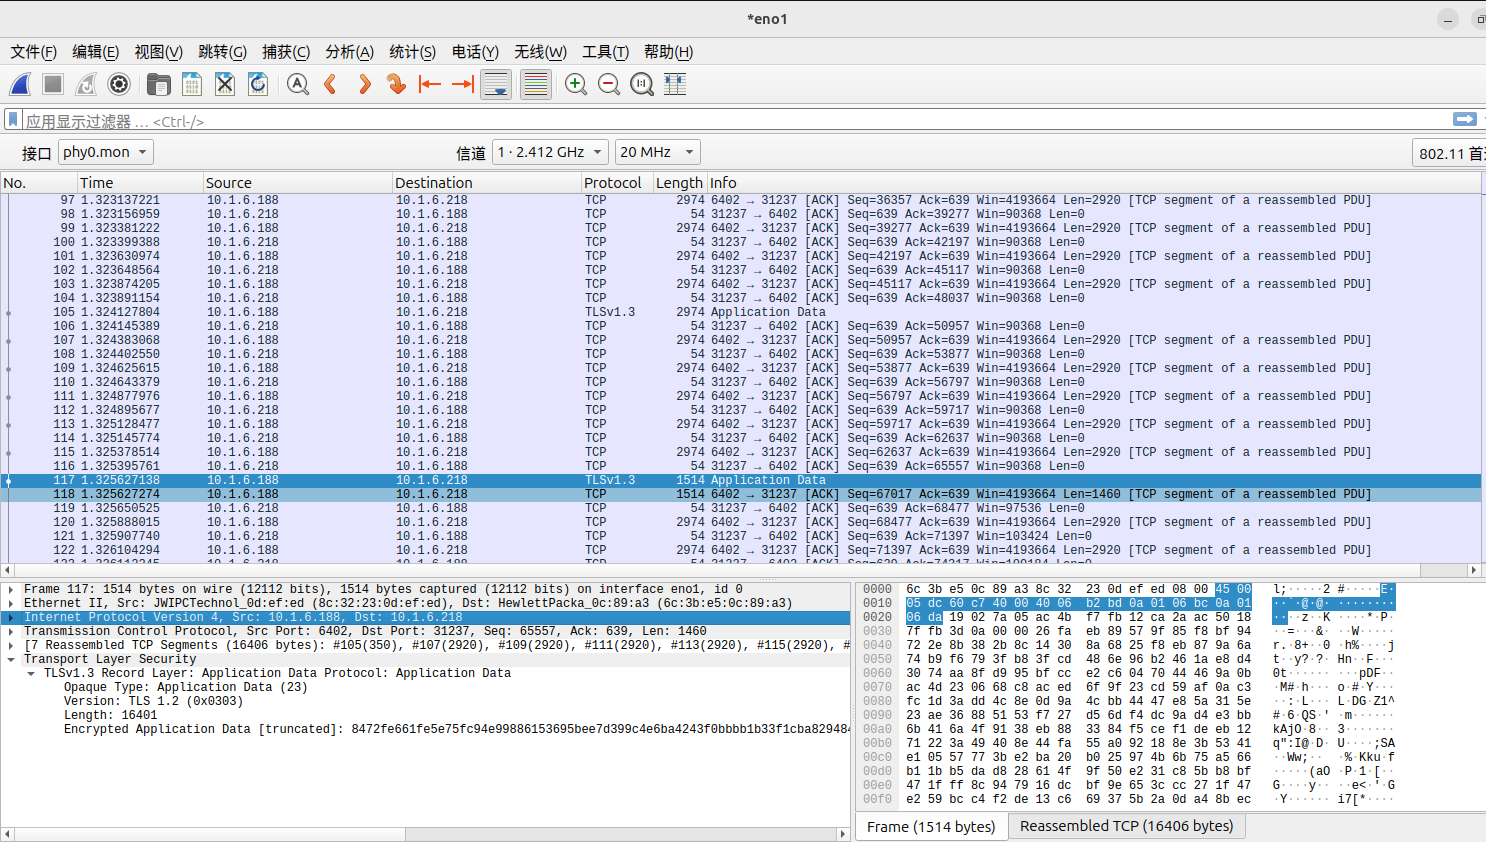
且发送的包Transport Layer Security都为TLS v1.3
右下角Frame中解析后都为乱码,证明确实为加密传输
证书/密钥后缀区别
KEY(Key)
KEY文件通常用于存储私钥或公钥。
与证书文件不同,KEY文件只包含密钥信息,不包含证书信息。
KEY文件可以使用PEM或DER格式进行编码。
使用PEM格式编码的KEY文件具有良好的可读性和可编辑性,而使用DER格式编码的KEY文件则更加紧凑和高效。
PEM(Privacy-Enhanced Mail)
PEM是一种基于ASCII编码的证书和密钥存储格式,广泛应用于安全领域,特别是在SSL/TLS协议中。
PEM文件通常以“.pem”为后缀名,可以包含公钥、私钥、证书等敏感信息。
PEM文件使用Base64编码,并且包含了起始标记和结束标记,以便于识别和区分不同类型的密钥和证书。由于PEM格式具有良好的可读性和可编辑性,它成为了一种广泛使用的证书和密钥文件格式。
DER(Distinguished Encoding Rules)
DER是一种二进制编码格式,用于表示X.509证书、CRL(证书吊销列表)和PKCS#7等数据结构。
DER文件通常以“.der”或“.cer”为后缀名。
与PEM格式相比,DER格式更加紧凑和高效,因为它使用二进制编码而不是Base64编码。
然而,DER格式的文件不易于阅读和编辑,通常需要专业的工具才能查看和解析。
CRT(Certificate)和 CER(Certificate)
CRT和CER都是证书文件的扩展名,它们通常用于存储X.509证书。
CRT文件通常用于存储公钥证书,而CER文件则用于存储包含公钥和私钥的证书。
然而,在实际应用中,CRT和CER文件的区别并不严格,它们通常可以互换使用。
CRT文件通常使用PEM或DER格式进行编码,而CER文件则通常使用DER格式进行编码。